TensorFlow object detection API应用
TensorFlow™ 是一个采用数据流图(data flow graphs),用于数值计算的开源软件库。节点(Nodes)在图中表示数学操作,图中的线(edges)则表示在节点间相互联系的多维数据数组,即张量(tensor)。它灵活的架构让你可以在多种平台上展开计算,例如台式计算机中的一个或多个CPU(或GPU),服务器,移动设备等等。TensorFlow 最初由Google大脑小组(隶属于Google机器智能研究机构)的研究员和工程师们开发出来,用于机器学习和深度神经网络方面的研究,但这个系统的通用性使其也可广泛用于其他计算领域。TF Object Detection API是一个很不错的api,可以直接拿过来用,闲的没事也可以自己训练训练集来玩玩。
1.1配置信息
win10+i5 8250+hd620集成显卡的环境
1.2软件需要
labellmg图片标注软件,需要一堆pyqt的辅助包具体这里。
jupyter notebook
tensorflow和anaconda
。。。
2.准备数据集
准备了20张鼠标图片,都是jpg格式,分别存放在两个文件夹下面,分成验证以及训练集(样本过少,后期会进行调整)。

具体的标注过程如下:
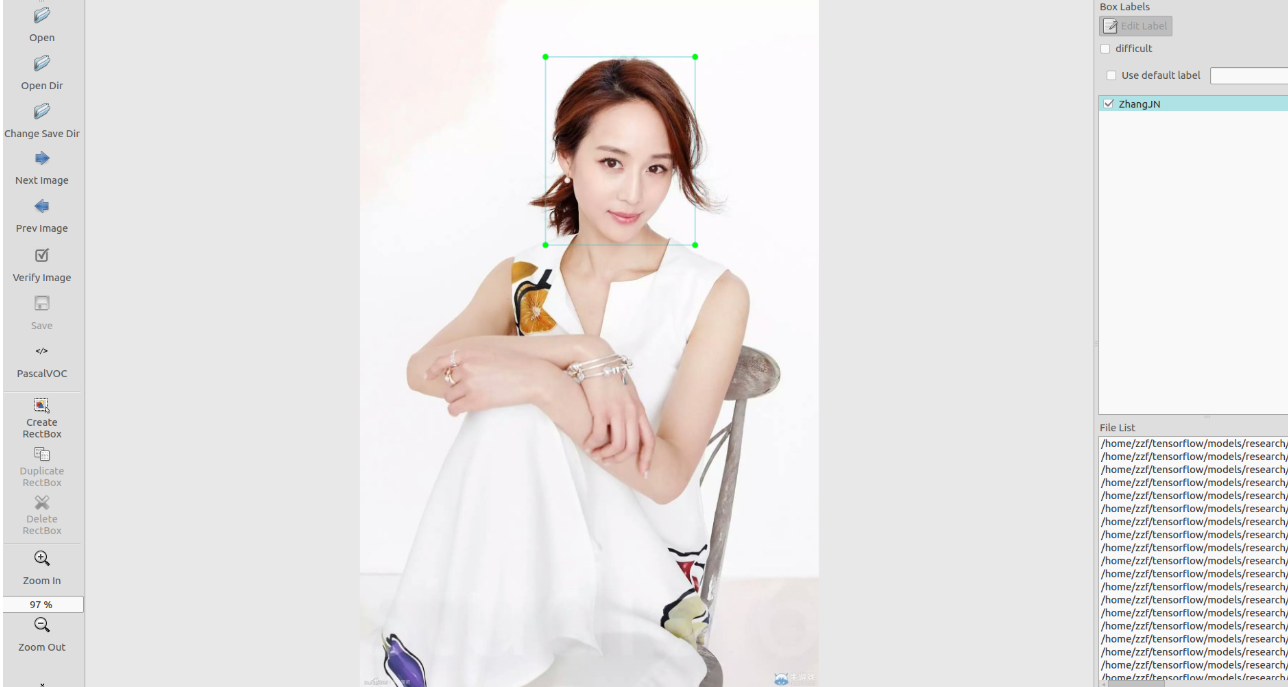
从而将jpg转化为xml文件,保存在原来的文件夹底下。接下来需要进行格式转换,把xml变成可以进行训练的 TFRecords Format 格式。写两个小python脚本文件,第一个将文件夹内的xml文件内的信息统一记录到.csv表格中,第二个从.csv表格中创建tfrecord格式。附上对应代码:
# xml->csv

import os
import glob
import pandas as pd
import xml.etree.ElementTree as ET

# os.chdir('mouse')
path = 'mouse/'#####################
def xml_to_csv(path):
    i=0
    xml_list = []
    for xml_file in glob.glob(path + '*.xml'):
        i+=1
        tree = ET.parse(xml_file)
        root = tree.getroot()
        for member in root.findall('object'):
            value = (root.find('filename').text,
                     int(root.find('size')[0].text),
                     int(root.find('size')[1].text),
                     member[0].text,
                     int(member[4][0].text),
                     int(member[4][1].text),
                     int(member[4][2].text),
                     int(member[4][3].text)
                     )
            xml_list.append(value)
    column_name = ['filename', 'width', 'height', 'class', 'xmin', 'ymin', 'xmax', 'ymax']
    xml_df = pd.DataFrame(xml_list, columns=column_name)
    print(i)
    return xml_df


def main():
    image_path = path
    xml_df = xml_to_csv(image_path)
    xml_df.to_csv('zhangjn_train.csv', index=None)#########
    print('Successfully converted xml to csv.')
main()
csv->tfrecord
# generate_tfrecord.py

# -*- coding: utf-8 -*-


"""
Usage:
  # From tensorflow/models/
  # Create train data:
  python generate_tfrecord.py --csv_input=data/tv_vehicle_labels.csv  --output_path=train.record
  # Create test data:
  python generate_tfrecord.py --csv_input=data/test_labels.csv  --output_path=test.record
"""


import os
import io
import pandas as pd
import tensorflow as tf

from PIL import Image
from object_detection.utils import dataset_util
from collections import namedtuple, OrderedDict

# os.chdir('/home/zzf/tensorflow/models/research/object_detection')

flags = tf.app.flags
flags.DEFINE_string('csv_input', '', 'Path to the CSV input')
flags.DEFINE_string('output_path', '', 'Path to output TFRecord')
FLAGS = flags.FLAGS


# TO-DO replace this with label map
def class_text_to_int(row_label):
    if row_label == 'mouse':     # 需改动
        return 1
    else:
        None


def split(df, group):
    data = namedtuple('data', ['filename', 'object'])
    gb = df.groupby(group)
    return [data(filename, gb.get_group(x)) for filename, x in zip(gb.groups.keys(), gb.groups)]


def create_tf_example(group, path):
    with tf.gfile.GFile(os.path.join(path, '{}'.format(group.filename)), 'rb') as fid:
        encoded_jpg = fid.read()
    encoded_jpg_io = io.BytesIO(encoded_jpg)
    image = Image.open(encoded_jpg_io)
    width, height = image.size

    filename = group.filename.encode('utf8')
    image_format = b'jpg'
    xmins = []
    xmaxs = []
    ymins = []
    ymaxs = []
    classes_text = []
    classes = []

    for index, row in group.object.iterrows():
        xmins.append(row['xmin'] / width)
        xmaxs.append(row['xmax'] / width)
        ymins.append(row['ymin'] / height)
        ymaxs.append(row['ymax'] / height)
        classes_text.append(row['class'].encode('utf8'))
        classes.append(class_text_to_int(row['class']))

    tf_example = tf.train.Example(features=tf.train.Features(feature={
        'image/height': dataset_util.int64_feature(height),
        'image/width': dataset_util.int64_feature(width),
        'image/filename': dataset_util.bytes_feature(filename),
        'image/source_id': dataset_util.bytes_feature(filename),
        'image/encoded': dataset_util.bytes_feature(encoded_jpg),
        'image/format': dataset_util.bytes_feature(image_format),
        'image/object/bbox/xmin': dataset_util.float_list_feature(xmins),
        'image/object/bbox/xmax': dataset_util.float_list_feature(xmaxs),
        'image/object/bbox/ymin': dataset_util.float_list_feature(ymins),
        'image/object/bbox/ymax': dataset_util.float_list_feature(ymaxs),
        'image/object/class/text': dataset_util.bytes_list_feature(classes_text),
        'image/object/class/label': dataset_util.int64_list_feature(classes),
    }))
    return tf_example


def main(_):
    writer = tf.python_io.TFRecordWriter(FLAGS.output_path)
    path = os.path.join(os.getcwd(), 'mouse')
    examples = pd.read_csv(FLAGS.csv_input)
    grouped = split(examples, 'filename')
    for group in grouped:
        tf_example = create_tf_example(group, path)
        writer.write(tf_example.SerializeToString())

    writer.close()
    output_path = os.path.join(os.getcwd(), FLAGS.output_path)
    print('Successfully created the TFRecords: {}'.format(output_path))


if __name__ == '__main__':
    tf.app.run()
对于训练集与测试集分别运行上述代码即可,得到train.record与test.record文件。
3.配置文件 准备训练
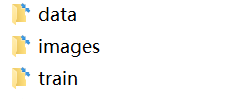
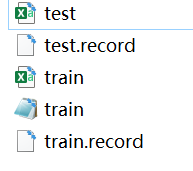
主要分为三个文件,data里面存放训练集以及验证集各自的csv以及record文档,image放图,train放训练的模型
接下来需要设置配置文件,在objec_detection/samples下,寻找需要的对于模型的config文件,
我们还可以在官方提供的model zoo里下载训练好的模型。我们使用ssd_mobilenet_v1_coco,先下载它。
把下载的ssd_mobilenet_v1_coco_2018_01_28文件夹放在train文件夹下面,把里面的pipeline.config放在train下面,具体格式如下:
model {
  ssd {
    num_classes:1#分了哪几类就写几
    image_resizer {
      fixed_shape_resizer {
        height: 300
        width: 300
      }
    }
    feature_extractor {
      type: "ssd_mobilenet_v1"#使用了哪一个模型
      depth_multiplier: 1.0
      min_depth: 16
      conv_hyperparams {
        regularizer {
          l2_regularizer {
            weight: 3.99999989895e-05
          }
        }
        initializer {
          truncated_normal_initializer {
            mean: 0.0
            stddev: 0.0299999993294
          }
        }
        activation: RELU_6
        batch_norm {
          decay: 0.999700009823
          center: true
          scale: true
          epsilon: 0.0010000000475
          train: true
        }
      }
    }
    box_coder {
      faster_rcnn_box_coder {
        y_scale: 10.0
        x_scale: 10.0
        height_scale: 5.0
        width_scale: 5.0
      }
    }
    matcher {
      argmax_matcher {
        matched_threshold: 0.5
        unmatched_threshold: 0.5
        ignore_thresholds: false
        negatives_lower_than_unmatched: true
        force_match_for_each_row: true
      }
    }
    similarity_calculator {
      iou_similarity {
      }
    }
    box_predictor {
      convolutional_box_predictor {
        conv_hyperparams {
          regularizer {
            l2_regularizer {
              weight: 3.99999989895e-05
            }
          }
          initializer {
            truncated_normal_initializer {
              mean: 0.0
              stddev: 0.0299999993294
            }
          }
          activation: RELU_6
          batch_norm {
            decay: 0.999700009823
            center: true
            scale: true
            epsilon: 0.0010000000475
            train: true
          }
        }
        min_depth: 0
        max_depth: 0
        num_layers_before_predictor: 0
        use_dropout: false
        dropout_keep_probability: 0.800000011921
        kernel_size: 1
        box_code_size: 4
        apply_sigmoid_to_scores: false
      }
    }
    anchor_generator {
      ssd_anchor_generator {
        num_layers: 6
        min_scale: 0.20000000298
        max_scale: 0.949999988079
        aspect_ratios: 1.0
        aspect_ratios: 2.0
        aspect_ratios: 0.5
        aspect_ratios: 3.0
        aspect_ratios: 0.333299994469
      }
    }
    post_processing {
      batch_non_max_suppression {
        score_threshold: 0.300000011921
        iou_threshold: 0.600000023842
        max_detections_per_class: 100
        max_total_detections: 100
      }
      score_converter: SIGMOID
    }
    normalize_loss_by_num_matches: true
    loss {
      localization_loss {
        weighted_smooth_l1 {
        }
      }
      classification_loss {
        weighted_sigmoid {
        }
      }
      hard_example_miner {
        num_hard_examples: 3000
        iou_threshold: 0.990000009537
        loss_type: CLASSIFICATION
        max_negatives_per_positive: 3
        min_negatives_per_image: 0
      }
      classification_weight: 1.0
      localization_weight: 1.0
    }
  }
}
train_config {
  batch_size: 1#和内存大小有关
  data_augmentation_options {
    random_horizontal_flip {
    }
  }
  data_augmentation_options {
    ssd_random_crop {
    }
  }
  optimizer {
    rms_prop_optimizer {
      learning_rate {
        exponential_decay_learning_rate {
          initial_learning_rate: 0.00400000018999
          decay_steps: 800720
          decay_factor: 0.949999988079
        }
      }
      momentum_optimizer_value: 0.899999976158
      decay: 0.899999976158
      epsilon: 1.0
    }
  }
  fine_tune_checkpoint: "data/model.ckpt"#使用原有的模型进行训练
  from_detection_checkpoint: true
  num_steps: 200000
}
train_input_reader {
  label_map_path: "data/train.pbtxt"#训练集的位置
  tf_record_input_reader {
    input_path: "data/train.record"
  }
}
eval_config {
  num_examples: 8000
  max_evals: 10
  use_moving_averages: false
}
eval_input_reader {
  label_map_path: "data/train.pbtxt"#验证集的位置
  shuffle: false
  num_readers: 1
  tf_record_input_reader {
    input_path: "data/train.record"
  }
}
data目录下面写一个train.pbtxt文件
item {
  id 1
  name 'mouse'
}
写入我们的标签,我的例子中是一个,id序号注意与前面创建CSV文件时保持一致,从1开始。
现在具体准备如下:
data文件夹:
images文件夹:
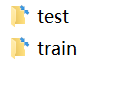
train文件夹:

接下来把这三个文件夹拖到object detection就ojbk了。
4.开始训练
去legacy文件夹把藏着的train.py拿出来放在ob文件夹下面,把61行clone_on_cpu变成True,到ob目录运行:
python train.py --logtostderr --train_dir=train/ --pipeline_config_path=pipeline.config
开始跑代码,刷刷刷
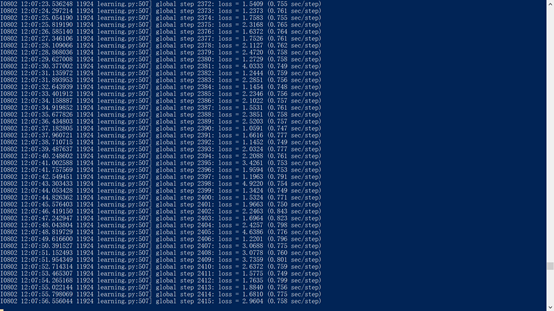
会出来一堆模型,在train文件夹下面:
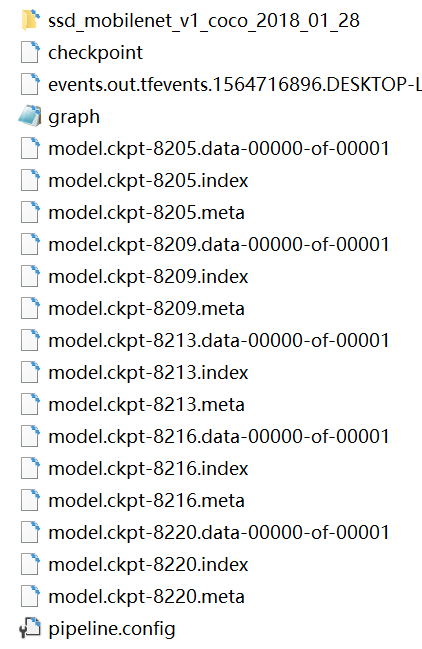
可以生成模型文件了:
python export_inference_graph.py --input_type image_tensor --pipeline_config_path train/pipeline.config --trained_checkpoint_prefix train/model.ckpt-8220 --output_directory data
其中,trained checkpoint 要改为自己训练到的数字, output为想要将模型存放在何处,我这里建了一个文件夹data 。运行结束后,就可以在data文件夹下看到若干文件,有saved_model、checkpoint、frozen_inference_graph.pb等。 .pb结尾的就是最重要的frozen model了,上一篇小demo里用的就是它,接下来我们测试就是要用到它。
5.测试
将object_detection目录下的object_detection_tutorial.ipynb打开,或者转成object_detection_ tutorial.py的python文件,更改一下就可以测试。
这里打开object_detection_test1.ipynb:
需要修改一下:
Model preparation
Variables
Any model exported using the export_inference_graph.py tool can be loaded here simply by changing PATH_TO_FROZEN_GRAPH to point to a new .pb file.
By default we use an “SSD with Mobilenet” model here. See the detection model zoo for a list of other models that can be run out-of-the-box with varying speeds and accuracies.
# What model to download.
MODEL_NAME = 'data'##################
# MODEL_FILE = MODEL_NAME + '.tar.gz'
# DOWNLOAD_BASE = 'http://download.tensorflow.org/models/object_detection/'####

# Path to frozen detection graph. This is the actual model that is used for the object detection.
PATH_TO_FROZEN_GRAPH = MODEL_NAME + '/frozen_inference_graph.pb'

# List of the strings that is used to add correct label for each box.
PATH_TO_LABELS = os.path.join('data', 'train.pbtxt')#######
Download Model
# opener = urllib.request.URLopener()####
# opener.retrieve(DOWNLOAD_BASE + MODEL_FILE, MODEL_FILE)####
'''
tar_file = tarfile.open(MODEL_FILE)
for file in tar_file.getmembers():
  file_name = os.path.basename(file.name)
  if 'frozen_inference_graph.pb' in file_name:
    tar_file.extract(file, os.getcwd())
'''
可以开始测试,发现效果一般:
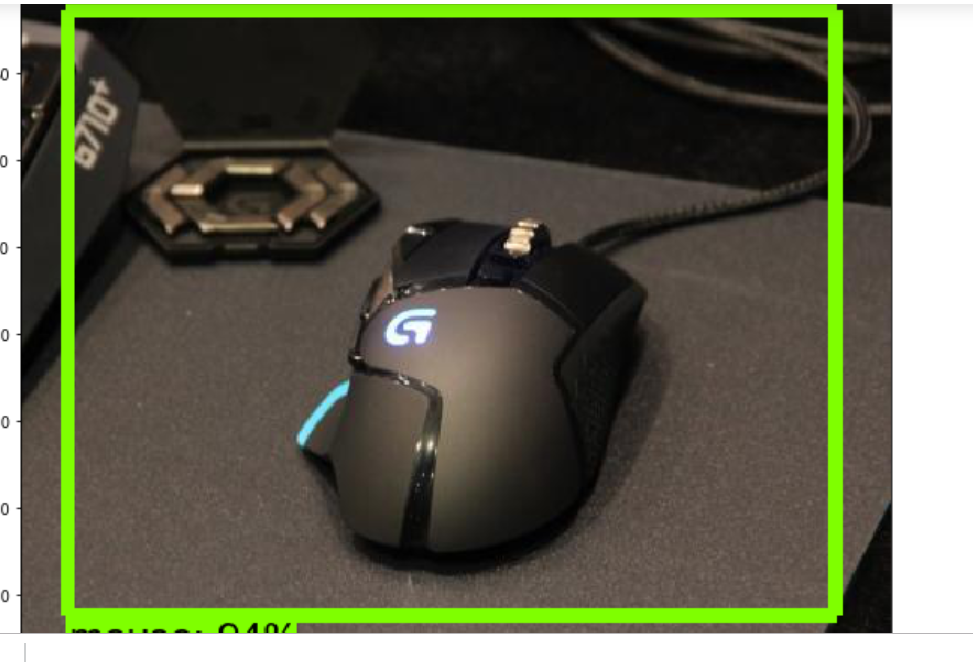
完事
参考
TensorFlow object detection API应用 - 理想几岁 - 博客园
| [Tensorflow object detection API 使用总结【win10 python3.6.5(anaconda)】,时间2018.7 | 易学教程](https://www.e-learn.cn/content/python/1046616) |
(3条消息)(Tensorflow Object Detection Api)模型训练 - ljyt2的博客 - CSDN博客